Week 5: June 4, 2014

In this week’s box:

6 pints of blueberries

2 bunches of beets w/tops

2 bunches of onions

5 cucumbers

Total retail value of goods in this week’s box: $45

Total retail value of goods distributed so far this year: $349

Emily’s notes

A lot of people think pickles are intimidating and require getting out all the sterile canning equipment. In fact, “icebox” pickles can be made very easily and have a fresh crunch to them that can add a truly satisfying element to backyard cook-out meals. Here’s a recipe from this month’s issue of Southern Living, adapted for the quantity of pickles in this week’s box

Icebox Cucumber Pickles

recipe from “Fun Food and Flowers,” cookbook of the Thomsasville, Ga., Garden Club

Ingredients

1 1/4 cups sugar

1 cup apple cider vinegar

1/8 cup canning and pickling salt

1/2 tsp celery seeds

1/2 tsp mustard seeds

1/4 tsp ground turmeric

5 medium cucumbers, cut into 1/4-inch slices

1 small onion, cut into 1.8-inch slices

Cook first six ingredients in a saucepan over high heat, stirring occasionally, until hot and sugar dissolves. Do not boil.

Place cucumbers and onions in a 2-quart airtight plastic container. Pour hot vinegar mixture over cucumbers and onions. Cool 30 minutes. Serve immediately or refrigerate in airtight container up to 2 weeks.

Cucumber slices also make a nice addition to a summer pitcher of ice water. Keep one in the fridge to encourage your household to hydrate on hot days.

Beets are another one of those two-for-one veggies. Use the tops as you would Swiss chard, sauteeing them or adding to egg dishes and similar fare. If you trim the tops off the roots as soon as you bring them home, both will last longer. The roots will actually keep a couple weeks in the fridge. For recipes, I’m going to send you to the beets page from last year’s blog, which includes recipes for a beet and goat cheese tart, simple roasted beets and beet chocolate “cake.”

Berries are not something I’ve ever had trouble using up in my house, but this week’s bevy of blueberries calls for some celebration. I love the combination of blueberry and lemon, so my pick for the week is this Blueberry Bread recipe from PBS’s Fresh Tastes blog, created by food writer Jenna Weber. If need be, you can always freeze extra blueberries in a single layer on a sheet pan and then package them in zip-top bags in the freezer for future smoothie, muffin and pancake making.

Week 9: June 26, 2013

In this week’s box:

3 pounds of green beans

1/2 dozen eggs

3 pounds of potatoes

2 bunches of green onions

2 bunches of beets

2 bunches of swiss chard

14 ears of bicolor corn(white and yellow on the same cob)

1 head of broccoli

1/2 pint of raspberries

1 pint of blackberries

1 bag of tomatoes

Retail value of this week’s box: $46

Total retail value of goods distributed so far this season: $472

Emily’s notes:

veg
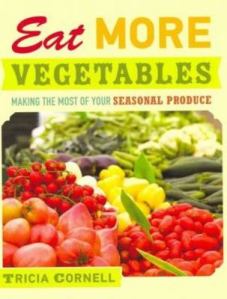
On a recent trip to the library, I stumbled upon a cookbook that I think would make a great reference in any CSA member’s kitchen. It’s called, “Eat More Vegetables” by Tricia Cornell, and was published in 2012. Cornell, who lives in Minnesota, is a longtime CSA member. She writes about how the weekly box of produce was overwhelming for her for the first few years of membership, and she even dreaded CSA pickup days at times because of the volume that came into her kitchen. But over the years she developed rhythms and devised dishes that made it all a lot more manageable and enjoyable for her entire family. There are some really creative recipes in here that look like a lot of fun. I think I might have to make an exception to my self-imposed ban on buying new cookbooks to add this one to the home library.

When I picked up this book, I was thinking about beets, which also appear in this week’s box. Cornell’s recipe for Beet and Goat Cheese Tart looked intriguing to me. I’m going to be entertaining guests this week, so I might give it a try. Here it is:

Beet and Goat Cheese Tart

Serves 8 as an appetizer

1 pound beets

1/2 cup plain yogurt

1 egg

6 ounces goat cheese

1 sheet frozen puff pastry, thawed

olive oil

1 to 2 tablespoons honey (optional)

1 teaspoon dried sumac (This is a Middle-Eastern spice that Cornell says is optional, but adds a nice tartness.)

Wrap beets in foil and roast at 400 degrees until a knife slides easily all the way through (This took about an hour with the beets we got last week.). You want beets on the softer rather than firmer side for this recipe. Leave the oven on. Peel the beets under running water as soon as they are cool enough to handle. Slice them 1/4 inch thick.

Mix yogurt, egg and goat cheese. Place pastry on lightly floured or parchment-lined baking sheet. Brush very lightly with olive oil. Cover pastry with overlapping disks of beets, leaving about 1 inch around the edges. Spoon goat cheese mixture over the top, still leaving the edges clear. Drizzle with honey (I am thinking balsamic vinegar might be a good alternative here.) and bake 35 to 40 minutes, until edges are puffed and golden brown. Cool completely, then slice into 2-inch squares and serve.

If you’re looking for more beet ideas, the beet salad described in this post on the blog “Dinner: A Love Story” looks nice to me. I also might have to make this beet hummus that has been on my to-do list for years, but never seems to get made before I use my beets for something else. Like cake.

With onions, green beans and potatoes in this week’s box, you’re all set up to make a classic Southern side, green beans and new potatoes. This recipe from the blog Deep South Dish gives a good guide. I can smell the bacon now.

On a busy night, I sometimes like to roast my green beans. They don’t get as soggy, and the flavors of what you dress them in intensify a bit. The last time we got green beans, I roasted them after tossing them with a mix of sesame oil, soy sauce, rice vinegar and brown sugar, with a sprinkling of sesame seeds. This recipe for parmesan roasted green beans from the blog Skinny Taste looks like something I’ll have to try with this batch.

And the first corn of the season is here! Last year I discovered that the best way to get corn on the table quickly on a weeknight was to toss it in the microwave, husk and all, and cook for about 3 minutes per ear (exact time will vary based on your microwave’s power). Remove it with a potholder (It’s hot!) and hack off the end that was attached to the stalk. Then you should be able to shake the cooked ear of corn straight onto your plate without having to deal with those pesky silks. It’s not quite as good as roasting corn in an oven (also with husks on) or grilling it, but it’s pretty good for a quick weeknight technique, which is what I need most of the time these days.

You could combine fresh corn taken off the cob with chopped tomates and onions from this week’s box for a quick fresh salsa. Toss the mixture with a little olive oil, lemon or lime juice, salt, pepper and cilantro (if you like it). Dice some of the potatoes and serve them hash-brown style, and scramble a few of the eggs. Spoon your salsa over the potatoes and eggs and you have a really tasty dinner completely from your CSA box!

You can click the “Swiss Chard” tag at right to see all the recipes we’ve linked to for chard so far this year. I am thinking of using my pizza dough recipe to make a chard calzone this week. I’ll share the recipe if it turns out!

This far into the season, I’d love to hear your thoughts on this blog. Are the recipes useful? Do they fit your lifestyle? Are there vegetables that you need more ideas for? Please e-mail me here with your comments (I will specify that I am asking for comments about the blog itself. Questions about CSA pickup should be directed to the Sneads.)

Week 8: June 19, 2013

In this week’s box:

sneads19

Total retail value of this week’s box: $41

Total retail value distributed so far this CSA season: $426

Emily’s notes:

First of all, welcome, berry season! These beauties sure are tasty, but be aware that raspberries are some of the most fragile berries, with the shortest shelf life, so carpe diem and heap them on ice cream or yogurt, or just pop them in your mouth, within a day or so. If you do want to save them (something that never becomes an issue in my house) place them in a single layer on a cookie sheet immediately after bringing them home and place them in the freezer. Once they’ve frozen, place them in a zip-top bag for storage.

A friend and fellow Snead’s CSA member recommended to me this recipe for Squash and Kohlrabi Empanadas last year. It would go well with this week’s box, and you could substitute kale, beet greens or kohlrabi greens for the spinach.

Speaking of kohlrabi, it was the featured vegetable this week on the blog Adventures of  a Yankee Kitchen Ninja. The blog’s weekly CSA rescue feature offers six ideas for using this vegetable. Find the post here.

Kale has become quite trendy as a superfood. It’s a dark leafy green that is packed with nutrients. I have grown kale in my backyard for the past two years, and have really grown to love it. In my house, we use it just about every day. I put it in smoothies with banana, yogurt, frozen fruits and other typical smoothie ingredients. I typically chop a handful of kale leaves to sprinkle on pizzas or in quesadillas when we make those. I love it in quiches, omelets and other egg dishes or in soups. And a big pot of stewed kale is also a favorite. I don’t use a recipe, but typically I start by heating either butter, oil or bacon in a Dutch oven. Then I add garlic and onions, and once those have cooked I add my kale, chopped and separated from the thick stems (which you could chop and saute with the onions). After the kale turns bright green, I add just enough water or chicken stock to halfway cover it and salt and pepper to taste (add some crushed red pepper if you like it, too). I cook this for a while, adding more liquid along the way if I think the greens need it. This is not the most exact of recipes, but to me this is a dish that can kind of sit on the stove until the rest of your dinner is ready.

If you want to get a bit more adventurous in your kale eating, I would recommend this recipe for BBQ kale chips from the local Doctor Yum Project. I am also a fan of using raw kale in what are called Massaged Kale Salad recipes.

The last time we got beets I decided that my favorite way to eat them is cooked (either roasted or boiled) and sliced on salads. But just in case you missed it, here is the recipe for chocolate beet cake that I concocted with our last bunch of beets.

You don’t have to get out the heavy canning equipment to make the most of pickling cucumbers. Here is a good post that explains the difference between various pickling methods, and offers a refrigerator pickle recipe for cucumbers.

Midweek recipe: Chocolate beet cake

photo-9

We’ve all been eating our vegetables pretty well lately, so we’ve earned something decadent. I enjoy beets on their own, but something about their color and texture had me wanting to do something rich and chocolatey with them. Sure enough, if you do a Web search, there are plenty of recipes for various beet-chocolate baked goods.

I couldn’t find anything that had quite the dense, fudge-like texture I was after, so I took my favorite brownie recipe and altered it a little. I’m not calling these brownies, because brownies don’t have beets in them, but this is a dense cake that will satisfy even the veggie-phobic in your household.

Chocolate beet cake

3 small to medium beets, trimmed of greens

2 eggs

3/4 cup sugar

1 teaspoon vanilla extract

1/2 cup butter, melted

3/4 cup Ghirardelli Sweet Ground Chocolate and Cocoa (Yes, this brand makes a difference. It is not just plain cocoa powder. It also makes amazing hot chocolate.)

1 cup flour

1/4 teaspoon baking powder

1/4 teaspoon salt

1/2 teaspoon cinnamon

1/2 cup semisweet chocolate chips

Place beets in a saucepan and cover with water. Simmer 45 minutes to an hour, or until fork tender. Remove from water (which can be used in soups) and let cool. Remove skins by rubbing them with your hands. Puree beets in a food processor or blender. You will need about 1 cup of beet puree.

Preheat oven to 350 degrees. Grease a 8×8 square pan, or an 8-inch round cake pan.

Crack eggs into a mixing bowl, add sugar and vanilla and beat everything together with a wooden spoon until well mixed. Add butter and mix to incorporate. Add beet puree and mix.

Without getting out another bowl, dump the cocoa, flour, baking powder, salt and cinnamon on top of the wet ingredients. Mix just until incorporated. Fold in chocolate chips. Spread in pan and bake 28-30 minutes, or until they reach desired level of doneness.

Midweek recipe: greens and beans (and whatever else) soup

photo-8

If your Memorial Day weekend was like mine, you came home from a few days on the road to a refrigerator drawer full of CSA vegetables you still needed to use. My kohlrabi were still rolling around in there, and my Swiss chard was starting to look tired. I woke it up with a soak in cold water, and then got started on one of my favorite vehicles for using the produce that threatens to go bad on us before we can use it: soup.

The recipe below is not the product of repeated fine-tuning in a test kitchen (though it is tasty). It is offered as an example of how you don’t always need a recipe to concoct tasty, economical dishes that will make the most of your CSA share.

A couple of notes:

  • I used a small amount of water in this soup. It came out thicker than most of my soups, and I kind of liked that, but you could use more water to give it a more traditional soup consistency. I also think that pureeing a bit of it, with the chickpeas included, and then pouring the puree back in with the rest of the soup would enhance the texture.
  • You could use chicken stock in place of water. A little wine wouldn’t hurt, either.
  • One of the things I like about soup for CSA cooking is that you can freeze it. Package it up in plastic containers or bags in portions you will use later on.
  • You will see CSA items from two different weeks in this recipe. Beet greens would work in this recipe (I usually prefer the whole beets on their own rather than mixed with a lot of other things in soups, but you could also use them in the same way the kohlrabi is used here.)

CSA drawer soup

1 green garlic plant, bulb and neck chopped finely

1/2 teaspoon red pepper flakes

2 tablespoons olive oil

1 bunch Swiss Chard, plus the greens from 4 kohlrabi, plus the greens from one beet, washed and chopped into small pieces (I kept the stems with the greens for this.)

2 kohlrabi, peeled and diced

1 28-ounce can crushed tomatoes

the empty can’s worth of water

2 cups chickpeas

In a Dutch oven or other large lidded pot, saute garlic and pepper flakes in the olive oil over medium heat until the garlic parts soften.

Add greens a few handfuls at a time and allow them to cook down. Salt them lightly as you add them. It helps to use tongs to toss the greens and garlic to make sure everything cooks evenly.

Add the kohlrabi, tomatoes and water. Bring to a boil, then turn the heat down and simmer for about 20 minutes. You want to make sure the kohlrabi cooks to a pleasant texture.

Add the chickpeas and cook until warmed through. Serve now or freeze for later. This would be great with a drizzle of olive oil and a sprinkle of parmesan cheese and some crusty bread.


Week 5: May 29, 2013

529board

Emily’s notes:

Last week, CSA members received garlic scapes, the flower stalk portion of the garlic plant. Today, you’re receiving the rest of the plant–two of them. Think of this as the garlic version of the green onions you’ve received earlier this CSA season. Every piece of this plant is edible, from the green tops to the young garlic bulbs. Green garlic is generally milder than mature garlic, and you can use it in any recipe where you’d normally use regular garlic. For a very detailed overview of how to store, cut and cook with this vegetable, see this helpful post on the website Food52.

Sugar snap peas are in full force this week. I like to substitute raw snap peas for chips in my lunches and snacks when I have so many of them in my house, but they also cook up into a variety of tasty side dishes. One basic technique is to blanch the trimmed snap peas by plunging them into boiling water for about  a minute, then throwing them directly into a big bowl of ice water to stop the cooking. You can actually do this a day ahead of time and store the prepped peas in the fridge. When you’re ready to make dinner, saute the peas in some butter over medium heat just until warmed through, and add some salt, pepper and lemon zest as they cook. Finish with a squeeze of lemon juice before serving.

When you get your beets home, be sure to separate the greens from the roots before storing them. Beets will keep for much longer this way. The greens can be used in any recipe that calls for Swiss chard, kale or other hearty greens. It’s like getting two vegetables in one. The roots can be used raw, grated into salads. I plan to roast mine using the technique below. Once roasted, beets will keep for a week in the fridge. Once you’ve roasted your beets, they are a lot easier to toss into salads throughout the week. Toss them with salt and pepper, vinaigrette and goat cheese for a chic salad that’s shown up on a lot of restaurant menus lately. They would also be great tossed with feta cheese, lemon juice, olive oil and quinoa or any other grain of your choice. To take advantage of the intense color of beets, try this recipe for summer borscht, a cold soup that will dazzle your table with its hot-pink color. I’m working on a slightly unorthodox use of beets that should appeal to the vegetable-phobic in your house. Check back laster this week to see how it turns out.

Roasted beets

Preheat oven to 400 degrees.

Trim beets of greens and scrub well. Wrap each beet loosely in aluminum foil.

Place beets on a rimmed baking sheet or dish to catch the red juices. Roast for 45 to 60 minutes. Beets are done when a fork goes in without resistance.

Allow beets to cool until you can handle them, then rub the outer skin off with your fingers or with a paper towel. If it doesn’t come off easily, the beets aren’t cooked enough. Store cooked and peeled beets in the refrigerator.